Key Takeaways
-
SolarEdge Home Hub Inverters are a smart choice for efficient energy management in solar-powered homes.
-
Before installation, gather all necessary tools and materials, and prioritize safety precautions to prevent accidents.
-
The installation process involves mounting the inverter, connecting it to solar panels, and integrating it with your home’s electrical grid.
-
For optimal performance, ensure the inverter is placed in a well-ventilated area and conduct regular maintenance checks.
-
Address common issues by understanding the inverter’s indicator lights and when to seek professional help.
Your Guide to SolarEdge Home Hub Inverter Installation
Embracing solar power is like unlocking a treasure chest of green energy. But to really tap into this potential, you need a reliable inverter to convert the sun’s rays into usable electricity for your home. That’s where the SolarEdge Home Hub Inverter comes in. It’s the maestro of your solar orchestra, ensuring every panel’s performance is harmonized and optimized for your daily use.

Understanding the SolarEdge Home Hub Inverter
Think of the SolarEdge Home Hub Inverter as the brain of your solar power system. It takes the DC (direct current) electricity generated by your solar panels and transforms it into AC (alternating current), which is what powers everything in your home, from the fridge to your phone charger. But it’s not just about conversion; this inverter also maximizes energy production by tracking the maximum power point of each panel.

Tools and Materials Needed
Before diving into the installation, you’ll need a few key tools and materials:
-
A drill with various bits for mounting the inverter on the wall
-
Screwdrivers for electrical connections
-
Wire strippers and crimpers for preparing cables
-
A multimeter for electrical tests
-
Personal protective equipment like gloves and safety glasses
-
The SolarEdge Home Hub Inverter and its user manual
-
All cables and connectors specified by the manufacturer
Safety First: Precautions Before Installation
Before you start, safety is paramount. Always switch off the power supply to avoid electric shock. Wear protective gear, and make sure you’re working in a dry environment. If you’re not confident in your electrical skills, there’s no shame in calling in a professional. Better safe than sorry, right?
Step-by-Step Installation Process
Ready to roll up your sleeves and get started? Here’s a step-by-step guide to get your SolarEdge Home Hub Inverter up and running.
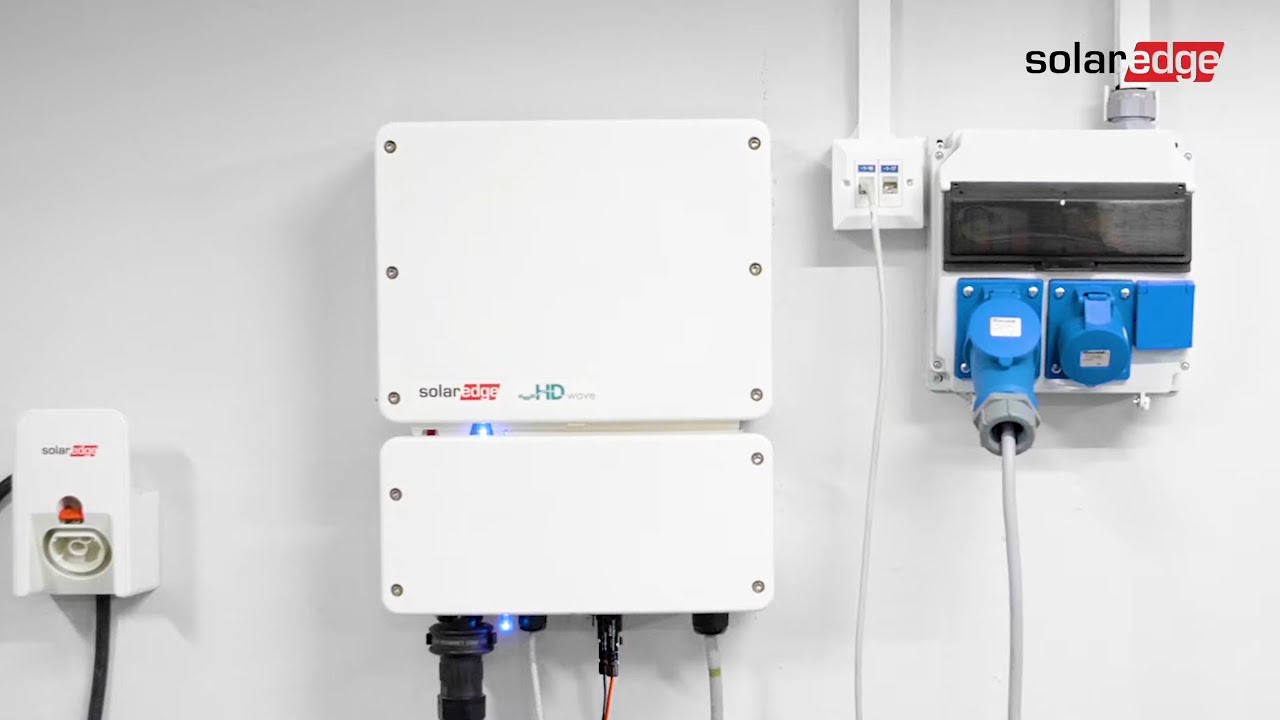
Mounting the Inverter
First things first, let’s find the perfect spot for your inverter. It should be a cool, shaded area that’s away from direct sunlight and has good air circulation. You’ll want to mount it on a wall, so grab your drill and let’s get to work:
-
Use the template provided in the manual to mark the drilling spots on the wall.
-
Drill the holes, insert the wall plugs, and secure the mounting bracket with screws.
-
Hang the inverter on the bracket and make sure it’s firmly in place.
Remember, the inverter can be heavy, so you might need an extra pair of hands to help you out.
Connecting the Inverter to the Solar Panels
Now, let’s connect the inverter to your solar panels. This is where the magic starts to happen:
-
Run the DC cables from your solar panels to the inverter’s DC terminals.
-
Strip the cable ends, attach the connectors, and secure them in the appropriate terminals as indicated in the manual.
-
Ensure the polarity is correct – positive to positive, negative to negative.
Double-check all connections to make sure they’re tight and secure. A loose connection can lead to inefficiencies or even safety hazards.
Attaching the Inverter to the Home Electrical Grid
With the DC side connected, it’s time to tie the inverter into your home’s AC electrical grid. This is a critical step, so if you’re not familiar with electrical systems, now would be the time to call in a certified electrician. If you’re proceeding on your own, turn off the main power and follow these steps:
-
Connect the inverter’s AC output to your home’s electrical panel.
-
Use the correct size and type of wire as specified by the manufacturer.
-
Secure the AC wires in the inverter’s AC terminal block, ensuring tight connections.
Once everything’s connected, turn the power back on and check the inverter’s display panel to ensure it’s operational. If all systems are go, you’ve just taken a giant leap towards energy independence!

Setting Up Wi-Fi and System Monitoring
One of the coolest features of the SolarEdge Home Hub Inverter is its ability to connect to Wi-Fi. This lets you monitor your system’s performance from anywhere. To set it up:
-
Download the SolarEdge monitoring app on your smartphone or tablet.
-
Power on the inverter and locate the Wi-Fi network it generates.
-
Connect to this network using the credentials found in the manual.
After connecting, follow the in-app instructions to link the inverter to your home Wi-Fi network. Now you can view real-time data and receive system alerts, ensuring your solar system is always performing at its peak.
But what if your Wi-Fi is spotty or you’re not a fan of apps? No problem. The inverter also has an Ethernet port for a wired connection, giving you the same access to data and system controls. Just plug it in, and you’re set.
Optimizing Inverter Performance
Now that your inverter is installed and connected, let’s talk about getting the most out of it. Performance isn’t just about the initial setup; it’s about placing the inverter in the ideal location and keeping it well-maintained.
Best Practices for Inverter Location
The right location can make a significant difference in your inverter’s performance. Keep these tips in mind:
-
Choose a spot that’s easily accessible for maintenance and monitoring.
-
Avoid areas that get too hot, as excessive heat can reduce the inverter’s efficiency.
-
Ensure there’s enough space around the inverter for proper ventilation.
These small steps can lead to a big payoff in terms of system longevity and energy production.

Regular Maintenance Tips
Maintaining your inverter is simpler than you might think. Here’s what you need to do regularly:
-
Keep the area around the inverter clean and free of debris.
-
Check the inverter’s air filters and clean or replace them as needed.
-
Inspect the wiring and connections for signs of wear or corrosion.
Most importantly, schedule an annual check-up with a professional to ensure everything’s working correctly.
Troubleshooting Common Issues
Even the best technology can encounter issues. If your inverter’s not acting right, here’s what to look for:
Indicator Lights and What They Mean
Your inverter’s indicator lights are a window into its soul. A green light usually means all systems are go. A red or orange light? That’s a sign something’s amiss. Consult the manual for specifics on what each color and pattern means, and how to respond.
When to Call a Professional
If troubleshooting doesn’t resolve the issue, or if you encounter a problem that’s beyond your know-how, don’t hesitate to call a professional. This could include:
-
System errors that persist after resetting the inverter
-
Physical damage to the inverter or wiring
-
Repeatedly tripped circuit breakers or safety switches
Remember, it’s better to tackle these issues early to prevent bigger problems down the road.
Maximizing Your Solar Investment
With your inverter installed and humming along, you’re well on your way to maximizing your solar investment. But there’s more you can do to ensure you’re getting the most bang for your buck.
Understanding your system’s output is key. Keep an eye on your energy production through the monitoring app and compare it to your consumption. Are you producing more power during peak sun hours than you’re using? Consider using high-energy appliances like washing machines during these times to take full advantage of your solar power.
Besides that, monitoring your system can also help you spot trends. Maybe your energy production dips during certain times of the year. This could be a cue to trim back some overhanging branches or schedule a cleaning to get rid of dust and leaves on your panels.
With these tips and a bit of attention, your SolarEdge Home Hub Inverter will be a reliable cornerstone of your home’s energy system for years to come. Embrace the sun, and enjoy the savings!
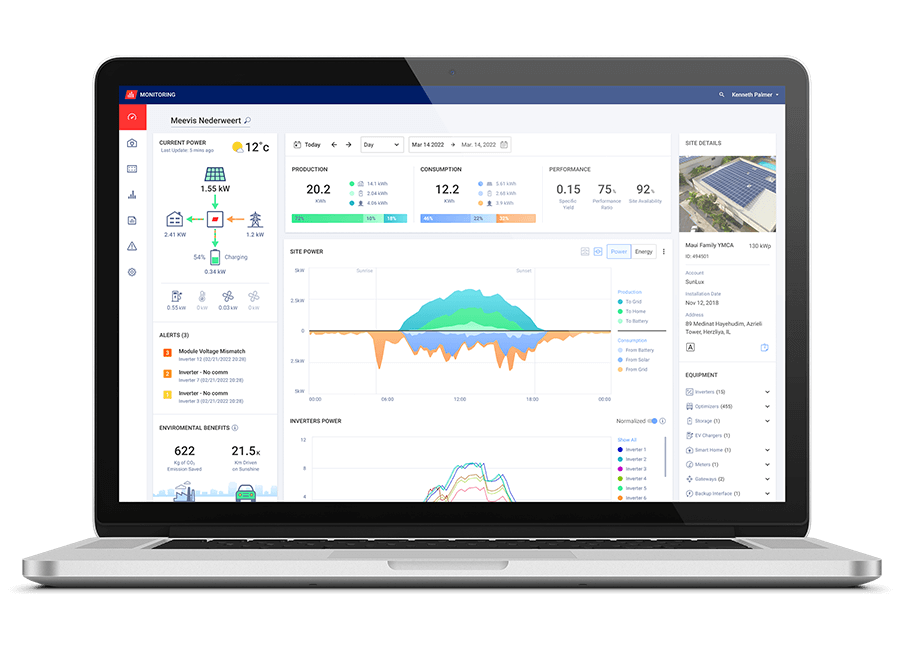
Monitoring and Interpreting Your Energy Data
Understanding your solar system’s output is crucial for getting the most out of your investment. The SolarEdge Home Hub Inverter comes with an intuitive monitoring platform that allows you to track your production and consumption in real-time. By keeping an eye on these figures, you can make informed decisions about your energy usage and see just how much you’re saving on your electricity bills.
For example, let’s say you notice that your energy production peaks at noon when the sun is highest. You can schedule your dishwasher or laundry machine to run during these hours, taking full advantage of your solar power and reducing your reliance on the grid.
Regularly check the system’s performance through the monitoring app. If you notice consistent underperformance, it might be time to investigate. It could be as simple as cleaning your panels or as complex as a system malfunction. Either way, the sooner you catch it, the sooner you can fix it.
Remember, the data from your inverter is not just numbers on a screen; it’s the story of your solar system’s life. By understanding and acting on this data, you can ensure your system is always in top shape, saving you money and reducing your environmental footprint.
FAQ
Got questions? You’re not alone. Here are some of the most common questions about the SolarEdge Home Hub Inverter, along with clear, straightforward answers.
Can the SolarEdge Home Hub Inverter Work With Any Solar Panel Type?
Yes, the SolarEdge Home Hub Inverter is designed to be compatible with most types of solar panels. However, for optimal performance and to ensure warranty coverage, it’s important to use panels that are approved by SolarEdge. Check the inverter’s specifications or consult with a professional to ensure compatibility with your existing or planned solar panel setup.
What is the Warranty Period for the SolarEdge Home Hub Inverter?
The SolarEdge Home Hub Inverter typically comes with a 12-year warranty, which can be extended to 20 or 25 years for an additional cost. This warranty covers defects in the inverter and gives you peace of mind that your investment is protected.
Keep in mind that to maintain the warranty, the inverter must be installed by a certified professional and used in accordance with the manufacturer’s instructions. Regular maintenance is also essential to prevent any issues that could void the warranty.
How Do I Update the Inverter’s Firmware?
Updating your inverter’s firmware ensures it’s running the latest software, which can improve performance and fix any known issues. To update the firmware:
-
Connect to the inverter’s Wi-Fi network using the SolarEdge SetApp.
-
Follow the in-app instructions to check for and install any available updates.
-
If an update is available, the app will guide you through the process step by step.
It’s a simple process that can have a big impact on your inverter’s efficiency and longevity.
Can I Install the Inverter Myself, or Do I Need a Professional?
While it’s possible to install the SolarEdge Home Hub Inverter on your own, especially if you have a background in electrical work, it’s generally recommended to hire a professional. Not only for safety reasons but also to ensure the installation is done correctly and to maintain the manufacturer’s warranty. A certified installer can also provide valuable advice on the best placement and setup for your specific situation.
What Should I Do if My Inverter is Not Connecting to Wi-Fi?
If your inverter is having trouble connecting to Wi-Fi, try the following steps:
-
Check to ensure that your home Wi-Fi network is working correctly.
-
Restart the inverter and attempt to reconnect to the network.
-
Make sure you’re within range of the inverter’s Wi-Fi signal.
-
If the problem persists, consult the troubleshooting section of the user manual or contact SolarEdge support for assistance.
Wi-Fi connectivity issues can be frustrating, but they’re usually easy to fix with a little troubleshooting.
And there you have it—a comprehensive guide to installing and optimizing your SolarEdge Home Hub Inverter. By following these steps and tips, you’ll be well on your way to a more sustainable and cost-effective energy future. So, soak up the sun and let your inverter do the rest!