Solar Clamp Installation: Secure Your Energy Future
Embracing solar technology is like setting sail on a voyage towards a greener future. But before you embark on this journey, it’s crucial to understand the nuts and bolts of solar clamp installation. It’s not just about harnessing the sun’s power; it’s about doing it right. Let’s walk through the process of securing your solar panels with clamps, ensuring they stay put and perform at their peak for years to come.
Key Takeaways
-
Understand the importance of proper solar clamp installation to maximize energy efficiency.
-
Learn the essential tools and materials needed for a successful DIY installation.
-
Discover the pre-installation checklist that will prepare you for a smooth setup.
-
Recognize the safety measures to keep in mind while working on your solar project.
-
Gain insights on selecting the right clamps for your solar panels to ensure durability and performance.
Pre-Installation Checklist
Before diving into the installation process, it’s vital to lay the groundwork. Start by assessing your roof’s condition and structure. Ensure it’s sturdy enough to support solar panels and check for any necessary repairs. Next, familiarize yourself with local building codes and regulations to avoid any legal hiccups. Lastly, sketch a layout of your solar array to visualize the placement of panels and clamps. This preparation sets the stage for a successful DIY project.
Safety First: Understanding the Risks
When it comes to working with solar installations, safety cannot be overstated. You’re dealing with heights, electricity, and often, the elements. Always wear protective gear like gloves and a hard hat. Secure your ladder, and if possible, work with a buddy. Remember, no energy savings are worth personal injury. If at any point you feel unsure, consult with a professional.
Electrical safety is equally important. Turn off the power when connecting your system to avoid shocks. And if you’re not confident with electrical work, it’s wise to get help from a certified electrician.
Gathering Your Tools and Materials
Every craftsman knows that the right tools make all the difference. For solar clamp installation, you’ll need a few specific items: a drill, a set of wrenches, a tape measure, and a level. These tools will help you secure the clamps firmly and ensure your panels are perfectly aligned for maximum sun exposure.
Essential Tools for the Job
Here’s what you’ll need to get started:
-
Electric drill with appropriate bits for your roof material
-
Wrench set for tightening bolts and nuts
-
Tape measure for precise spacing between clamps
-
Spirit level to ensure your panels are perfectly horizontal
-
Marker or chalk to mark drill points accurately
With these tools in hand, you’re ready to tackle the task of solar clamp installation like a pro. Stay tuned as we guide you through the rest of this enlightening process in the next part of our article.
Selecting the Right Clamps for Your Solar Panels
Clamps are the unsung heroes of solar installations, keeping your panels anchored against the forces of nature. When selecting clamps, consider the type of your solar panels and the configuration of your mounting system. There are two main types of clamps: mid-clamps and end-clamps. Mid-clamps hold panels together in a row, while end-clamps secure the outer edges. Opt for clamps that are compatible with the size and thickness of your panels to ensure a snug fit.
Tip: When in doubt, consult your solar panel manufacturer’s mounting guide to choose the appropriate clamps for your specific model.
Materials Needed Beyond the Solar Kit
Your solar kit comes with the basics, but you’ll need a few extra materials to complete the installation:
-
Roofing sealant to prevent leaks at the mounting points
-
Stainless steel bolts and nuts for rust-resistant durability
-
Wire management clips to keep your installation neat and safe
-
Grounding clips (WEEBs) to protect your system from electrical surges
These additional materials will ensure a weatherproof, secure, and long-lasting solar setup.
Mounting the Solar Panels: A Step-by-Step Approach
With the right tools and materials at hand, you’re ready to mount your solar panels. This step-by-step approach will guide you through the process, from finding the perfect spot to securing the panels in place.
Locating the Ideal Installation Spot
Choosing the right location is pivotal for optimal solar panel performance. Look for a spot on your roof that gets maximum sunlight throughout the day. Avoid areas shaded by trees, chimneys, or other structures. Use a solar pathfinder or an app to track the sun’s path and find the best location. Remember, the more sunlight your panels receive, the more energy they can generate.
Attaching the Mounting Rails
Mounting rails are the foundation of your solar panel system. Start by marking the spots where the rails will be attached, using your layout sketch as a guide. Drill pilot holes, apply roofing sealant to prevent leaks, and then secure the rails with stainless steel bolts. Ensure the rails are level; an uneven installation can reduce the efficiency of your solar panels.
Securing the Solar Clamps
Now, it’s time to secure your solar panels with clamps. Here’s how:
-
Position your solar panels onto the mounting rails.
-
Slide mid-clamps between each panel and tighten them to hold the panels together.
-
Place end-clamps at the ends of the panel rows and secure them firmly.
-
Double-check all clamps to ensure they’re tight and the panels are securely fastened.
By following these steps, your solar panels will be well-attached and ready to capture the sun’s energy efficiently. Stay tuned for the next installment where we’ll cover connecting your panels to the power system and addressing common installation challenges.
Connecting the Panels to Your Power System
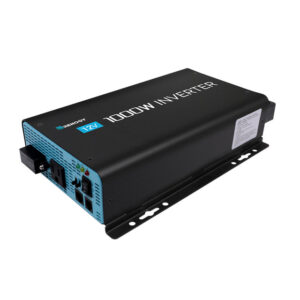
Once your solar panels are firmly clamped in place, it’s time to weave them into your home’s electrical tapestry. This involves connecting the panels to an inverter, which transforms solar power into electricity you can use. Start by connecting the cables from the panels to the inverter, ensuring they’re properly insulated and secured. Follow the manufacturer’s guidelines to make sure the connections are correct and safe. If you’re not confident with wiring, this is a good moment to call in a licensed electrician.
Overcoming Common Clamp Installation Challenges
Even with careful planning, you might hit a few snags during your DIY solar clamp installation. Let’s address some common challenges and how to tackle them.
Dealing with Roof Obstructions
Roof vents, skylights, and chimneys can all get in the way of your ideal solar panel layout. When these obstructions can’t be avoided, it’s about working smart. You may need to adjust your panel layout or use tilt mounts to angle the panels away from shadows. It’s a bit of a puzzle, but with some creativity, you can find a solution that keeps your panels basking in the sunlight.
Ensuring Proper Alignment and Spacing
Alignment and spacing are critical for the performance and appearance of your solar array. Use a tape measure to keep the spacing between panels consistent. A level is your best friend to ensure panels are parallel to the roof edge. This not only affects how your system looks but also its efficiency. Unevenly spaced or misaligned panels can cast shadows on each other, reducing the overall energy production.
Pro tip: Check the alignment at various points during installation to avoid having to backtrack and make major adjustments later on.
Weather Considerations and Impact on Installation
Weather can be a fickle friend when installing solar panels. Ideal conditions are a cool, overcast day, which keeps the panels and you from overheating. However, if you’re faced with rain, wind, or extreme heat, it’s best to postpone. Not only is it safer, but it also ensures the sealant and other materials set properly. And remember, no matter how eager you are to get your panels up, safety always comes first.
Maintenance and Post-Installation Tips
Your solar panels are now a proud part of your home, but the journey doesn’t end here. Regular maintenance ensures they continue to work efficiently and safely.
Routine Checks and Upkeep for Longevity
Like any well-oiled machine, your solar panel system thrives on attention and care. Regular checks can prevent small issues from becoming big problems. At least twice a year, give your system a once-over. Look for loose clamps, potential corrosion, or wear and tear on wires. It’s also a good idea to keep the panels clean; a layer of dust can reduce their efficiency. Clear off any leaves or debris that might have settled on the surface. These simple acts of upkeep can keep your system running smoothly for the long haul.
-
Inspect the integrity of clamps and mounting hardware.
-
Clean the solar panel surfaces to ensure maximum light penetration.
-
Check for and replace any worn or damaged wiring.
-
Ensure the inverter is displaying the correct information and functioning properly.
-
Look for vegetation overgrowth that may cast shade on the panels.
-
Review your energy bills to track system performance over time.
Troubleshooting Common Post-Installation Issues
Even the most meticulously installed solar systems can encounter hiccups. If you notice your energy output isn’t up to snuff, first check for the obvious: are the panels clean and unobstructed? Next, verify that all connections are secure and intact. If the issue persists, it may be time to consult your installation manual or reach out to a professional. Keep a log of any issues and how you resolved them; it could be invaluable for future troubleshooting or if you decide to expand your system.
-
Decreased energy output could signal dirty panels or shading issues.
-
Loose connections can disrupt the flow of electricity.
-
Inverter problems often display error codes that can guide you to a solution.
-
Monitoring system alerts can preemptively notify you of potential issues.
Empowering Your Home: The Impact of Proper Installation
Installing solar panels is more than just a home improvement project; it’s an investment in a sustainable future. A proper installation not only secures your panels physically but also ensures they work at peak efficiency. This means more clean energy and less reliance on the grid. You’re not just saving money; you’re part of a movement towards a cleaner, more resilient energy system.
Energy Efficiency and Cost Savings
The beauty of solar energy lies in its ability to slash your electric bills. With a well-installed system, you could see significant savings over time. The key is efficiency. Properly installed and maintained panels capture more sunlight and convert it into usable energy, meaning you draw less from the grid and save more on your bills. It’s a win-win for your wallet and the environment.
-
Maximized sunlight capture through correct panel positioning.
-
Reduced energy bills by generating your own electricity.
-
Less wear and tear on the system due to proper installation.
-
Potential for excess energy production to be sold back to the grid.
Boosting the Value of Your Property
Solar panels are a smart upgrade that can increase your home’s value. Prospective buyers often see the benefit of a home equipped with a renewable energy source. It’s an attractive feature that can set your property apart in the market. Plus, with the growing awareness of environmental issues, a home with solar panels is not just a house; it’s a statement of sustainability.
-
Homes with solar installations often have higher resale values.
-
Solar panels can be a significant selling point for eco-conscious buyers.
-
Energy-efficient homes may qualify for green tax credits and incentives.
-
A solar system can serve as a long-term investment, yielding savings for years.
Frequently Asked Questions
Got questions? You’re not alone. Here are some of the most common queries we get about DIY solar clamp installation:
How do I ensure the clamps are tightened correctly without damaging the panels?
Ensuring that your solar clamps are tightened correctly is crucial to the integrity of your solar installation. Over-tightening can lead to damaged panels, while under-tightening might leave your system vulnerable to the elements. The secret is to use a torque wrench. Most clamps come with manufacturer-recommended torque settings, which you should follow meticulously. If you’re unsure, tighten until you feel resistance, then give it a small additional turn, but stop if you notice any flexing or bending of the panel frame.
Always follow the manufacturer’s specifications for torque settings to avoid damage to your solar panels.
What are the differences between mid-clamps and end-clamps and where are they used?
Mid-clamps and end-clamps are the two types of clamps used in solar installations, and they serve different purposes. Mid-clamps are used between solar panels, securing them to the mounting rails and to each other. They are designed to hold the panels at the correct distance apart for ventilation and expansion. End-clamps, on the other hand, are used at the ends of a row of panels. They provide the finishing hold, ensuring the last panel in the sequence is just as secure as those between mid-clamps.
-
Mid-clamps go between panels.
-
End-clamps are used at the ends of panel rows.
-
Both types of clamps ensure panels are secure and properly spaced.
Can I install solar clamps on a tile roof, and what additional precautions are needed?
Yes, solar clamps can be installed on a tile roof, but it requires extra care. Tile roofs are more fragile than other types, so you’ll need to use mounting brackets that are specifically designed for tile. These brackets often hook under the tiles or replace a tile entirely. It’s important to avoid drilling directly into the tiles to prevent cracks. Additionally, use a high-quality sealant around the mounting points to prevent water ingress, which can lead to leaks and damage over time.
Use specialized mounting brackets and sealant to protect your tile roof during solar clamp installation.
What do I do if my roof doesn’t have standard rafter spacing?
Non-standard rafter spacing is a common issue, but it’s not a deal-breaker for your solar installation. Adjustable mounting brackets can be used to overcome this challenge. These brackets allow for flexibility in where you place the mounting rails, which means you can secure them to the rafters no matter their spacing. Always ensure that the rails are aligned and level, even when using adjustable brackets, to maintain the efficiency and stability of your solar panels.
Adjustable mounting brackets offer a solution to non-standard rafter spacing, ensuring secure and level mounting of solar panels.
How often should I perform maintenance checks on my solar panel installation?
Regular maintenance is key to the longevity and efficiency of your solar panel system. It’s recommended to perform a thorough check at least twice a year. However, if your area is prone to severe weather conditions like heavy snowfall or strong winds, more frequent checks might be necessary. Look for any loose clamps, potential corrosion, or damage to the panels. Keeping the panels clean from debris and dust will also ensure they operate at peak performance. Remember, a well-maintained solar system not only lasts longer but also provides better energy output.
-
Inspect your solar system at least twice a year.
-
Check more frequently in areas with severe weather.
-
Look for loose clamps, corrosion, or damage.
-
Keep panels clean for optimal performance.
In conclusion, DIY solar clamp installation is a rewarding project that can enhance your home’s energy efficiency and contribute to a sustainable future. By following the guidelines and tips provided, you’ll be well-equipped to install your solar panels securely and safely. Remember, the key to a successful installation lies in preparation, using the right tools and materials, and adhering to safety protocols. Regular maintenance will ensure your system continues to provide clean energy for years to come. With your new solar installation, you’re not just saving on energy costs; you’re also taking an active role in protecting the environment for future generations.


