Key Takeaways
- The Renogy 400W Solar Kit is a comprehensive solution for off-grid tiny homes, providing clean and renewable energy.
- It includes high-efficiency monocrystalline solar panels, a charge controller, wiring, and connectors, making installation straightforward.
- This solar kit can generate an average of 1.6-2.5kWh of electricity per day, depending on sunlight availability.
- Maintenance is minimal, involving regular cleaning and inspections to ensure optimal performance.
- Financial incentives, such as rebates and tax credits, may be available to offset the initial investment in solar technology.

The Solar Solution: Harnessing Sunlight for Tiny Homes
Embracing the sun’s power to energize our homes isn’t just a dream; it’s a practical solution that’s within our grasp. For those living in tiny homes, the idea of going off-grid isn’t merely about adventure—it’s about sustainability and independence. And that’s where the Renogy 400W Solar Kit comes into play, offering a perfect blend of efficiency, reliability, and simplicity for the eco-conscious homeowner.
The Quest for Sustainable Off-Grid Living
Imagine the freedom of living untethered to the traditional power grid, with the ability to generate your own clean energy. This is the reality for many tiny home dwellers who have turned to solar power as their energy source. The Renogy 400W Solar Kit represents a significant step towards self-sufficiency, reducing reliance on fossil fuels and minimizing one’s carbon footprint.
Why Solar? Benefits for Tiny Home Dwellers
Choosing solar energy for your tiny home isn’t just about being environmentally friendly. It’s a practical choice that offers a multitude of benefits:
- Cost-Effectiveness: Once installed, solar panels can significantly reduce or even eliminate electricity bills.
- Energy Independence: Solar power provides the freedom to live off-grid, crucial for tiny homes situated in remote locations.
- Low Maintenance: Solar systems require minimal upkeep, making them ideal for those seeking a low-maintenance lifestyle.
But the perks don’t stop there. Solar energy systems can increase the value of your property and, in many cases, come with financial incentives that make the switch even more appealing.
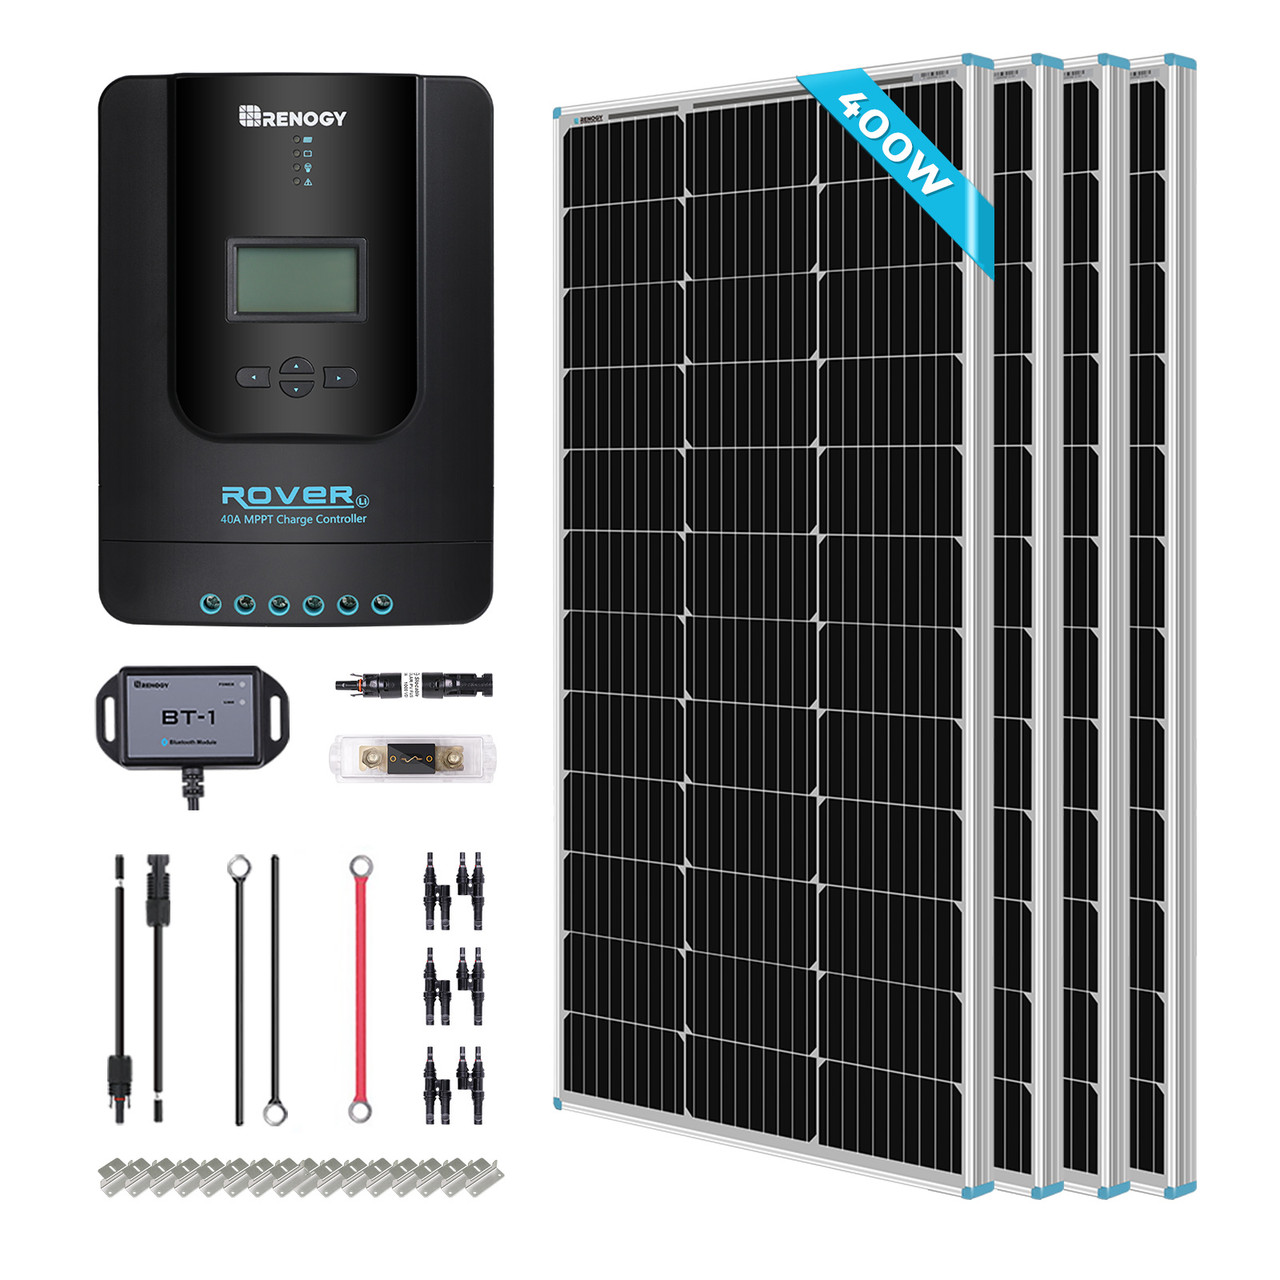
Key Features of the 400W Renogy Solar Kit
The Renogy 400W Solar Kit is more than just a set of panels; it’s a gateway to greener living. Its design is tailored specifically for those who are conscious of their environmental impact and are looking to make a significant change in their energy consumption.
Here’s a closer look at what the Renogy 400W Solar Kit brings to the table:
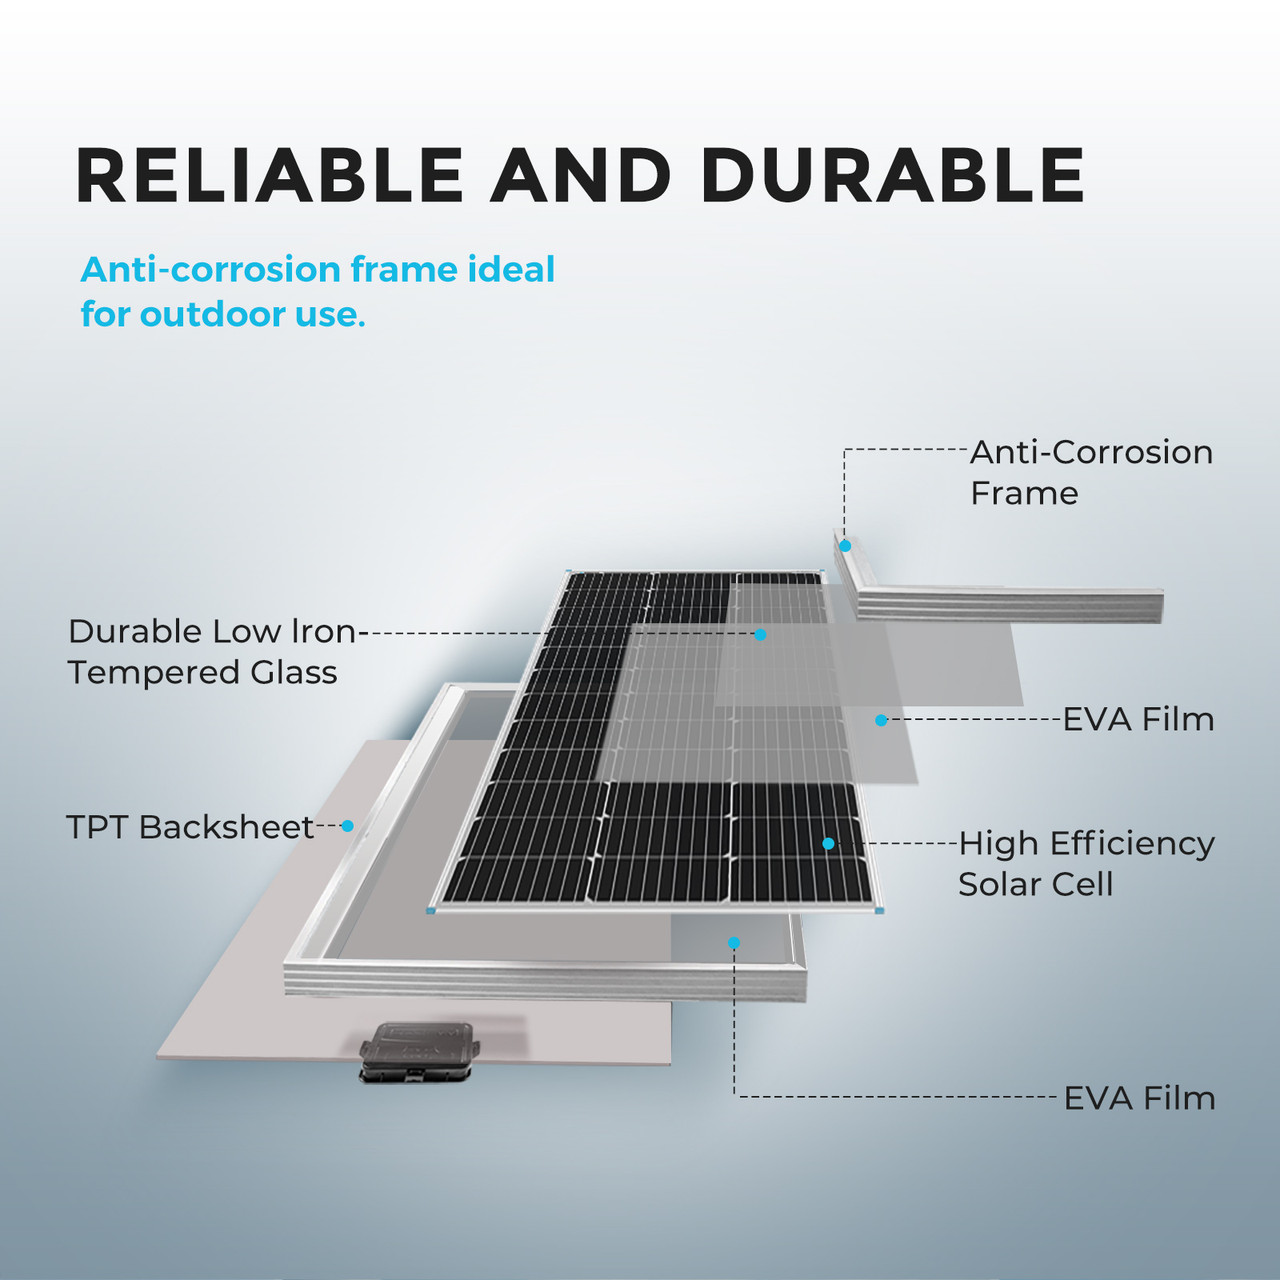
- High-Efficiency Monocrystalline Panels: Renogy’s solar panels are known for their ability to convert a higher percentage of sunlight into electricity.
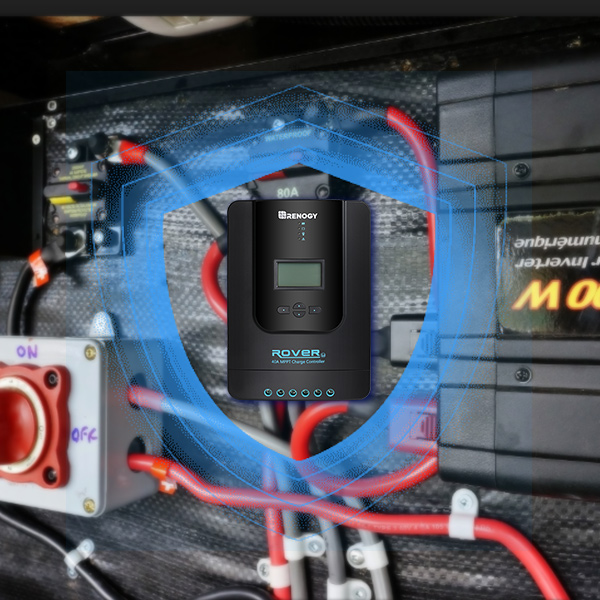
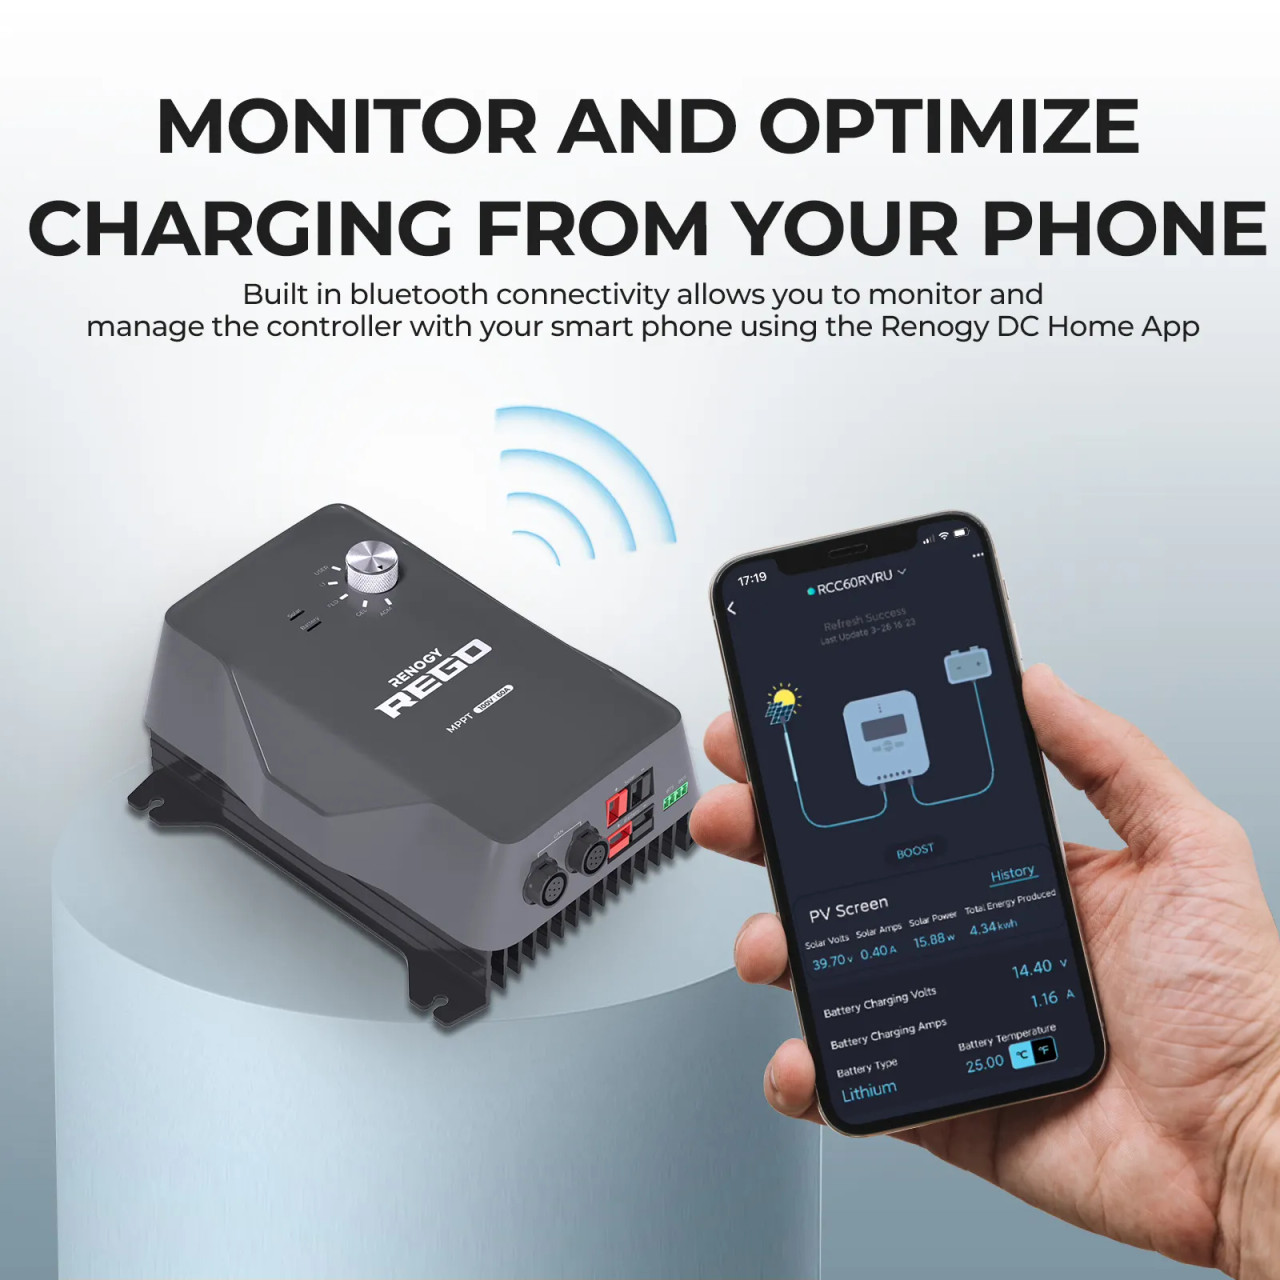
- Integrated Charge Controller: This ensures that your batteries are charged safely and efficiently, prolonging their lifespan.
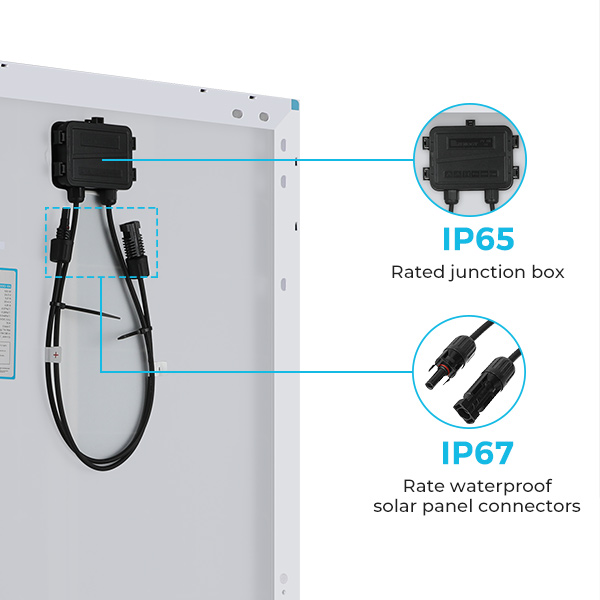
- Complete System: The kit includes all the necessary wiring and connectors, removing any guesswork from the installation process.
Components of the 400W Kit
The Renogy 400W Solar Kit is thoughtfully packaged with everything you need to start harnessing the power of the sun:
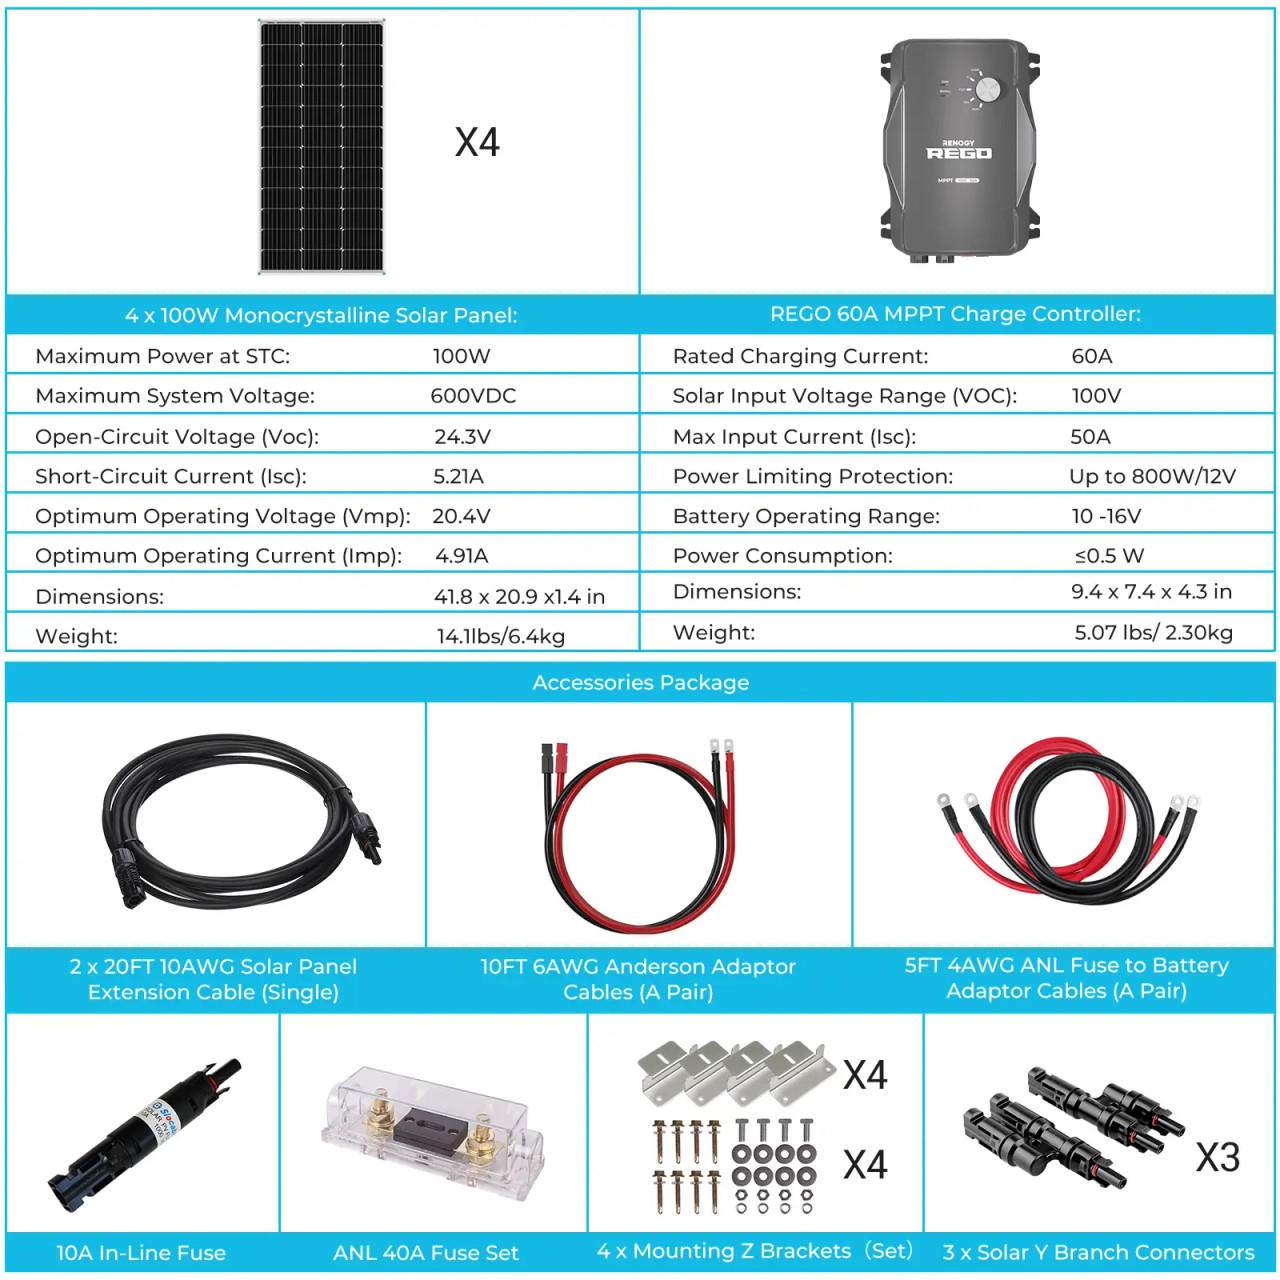
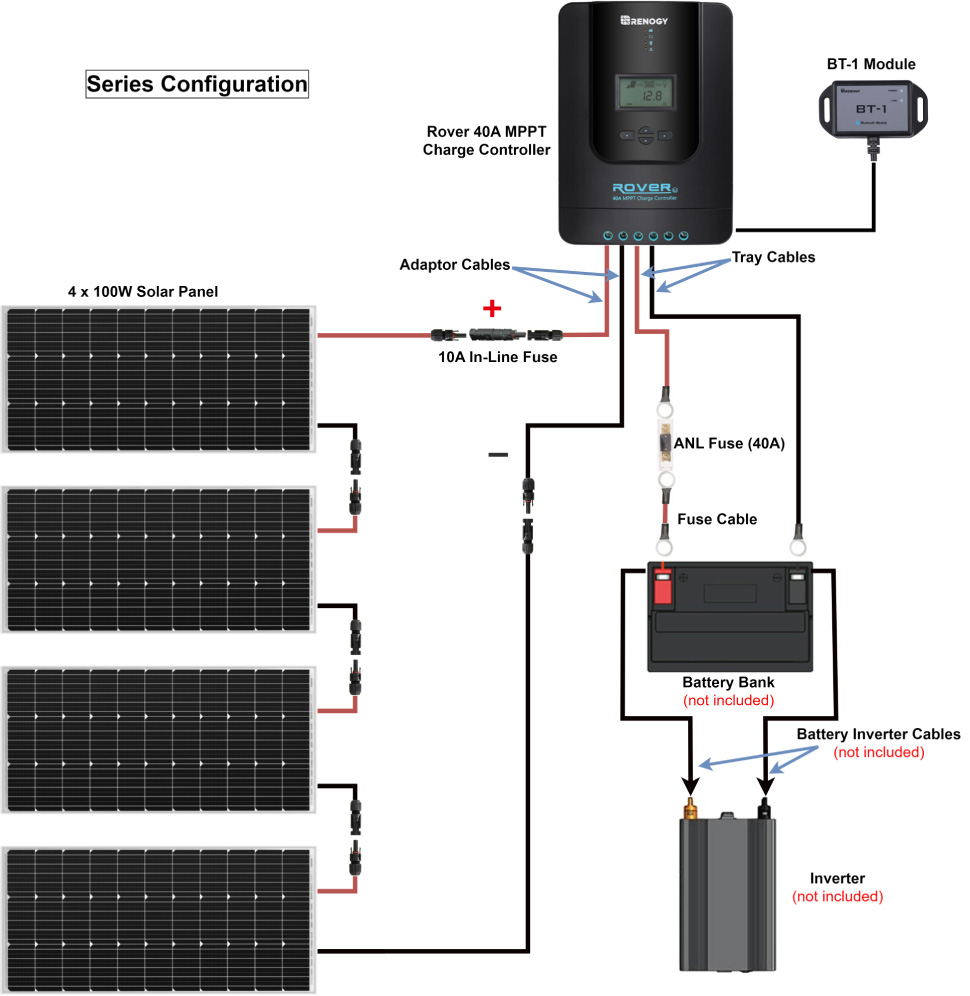
- Solar Panels: Four 100W monocrystalline solar panels, known for their durability and high performance.
- Charge Controller: A 30A PWM negative-ground charge controller protects your battery from overcharging and over-discharging.
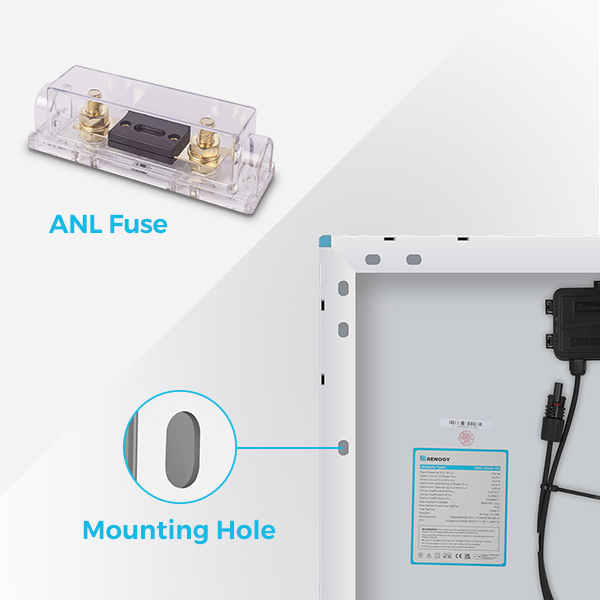
- Mounting Hardware: Z-brackets and bolts for securing the panels to your roof or chosen surface.
- Wiring: Solar panel cables and a tray cable are included to connect the charge controller to the battery.
- MC4 Connectors: These connectors allow for safe and simple connections between panels.
With these components, you’ll have a fully operational solar power system that’s primed to bring renewable energy to your tiny home.
Setting Up Your Renogy Solar Kit
Installation Steps Simplified
Installing your Renogy 400W Solar Kit is an exciting step towards energy independence. Let’s break down the process into manageable steps:
- Review the instruction manual carefully.
- Identify the location for your solar panels where they will get maximum sunlight.
- Secure the mounting brackets to your roof or structure.
- Install the solar panels onto the brackets.
- Connect the solar panels to the charge controller using the provided cables.
- Link the charge controller to your battery or power bank.
Remember, safety first! Always ensure you’re working in safe conditions, especially when working at heights or with electrical components.

Tools and Equipment Needed
Before you begin the installation, gather the following tools and equipment:
- Drill and drill bits
- Wrench set
- Screwdriver
- Wire cutters and strippers
- MC4 connectors (included in the kit)
- Protective gloves and eyewear
Having the right tools on hand will make the installation process smoother and safer.

Choosing the Perfect Location for Solar Panels
The ideal location for your solar panels is crucial for optimal energy production. Here are some factors to consider:
- Orientation: In the Northern Hemisphere, solar panels should face true south for maximum sun exposure.
- Tilt angle: Adjust the tilt of your panels according to your latitude for the best angle to the sun.
- Shade: Avoid locations where shadows from trees, buildings, or other obstructions may fall on the panels.
By carefully selecting the location, you ensure your solar system operates at peak efficiency.
Maintaining Your Solar Setup
Maintenance of your solar system is straightforward but essential. Here’s what you need to do:
- Clean the panels periodically to remove dust, leaves, or snow that may accumulate and block sunlight.
- Check all electrical connections and tighten any that may have become loose over time.
- Inspect the charge controller and batteries to ensure they’re functioning correctly.
Regular maintenance will keep your system running smoothly for years to come.
Optimizing Your Solar Investment
Monitoring and Adjusting the Systems
To get the most out of your solar setup, you’ll want to monitor its performance and make adjustments as needed. Here’s how:
- Use a solar monitoring system to track energy production and consumption in real-time.
- Adjust the tilt of your panels seasonally to follow the sun’s path.
- Consider adding a battery monitor to keep an eye on your storage levels.
With these measures, you can ensure your system is always running at its best.
Expanding Your Solar Capacity
If you find your energy needs growing, expanding your solar system is a viable option. You can:
- Add more panels to your existing setup.
- Upgrade to a larger charge controller if necessary.
- Increase your battery storage to hold more energy.
Expansion allows you to scale your energy production in line with your consumption.
Frequently Asked Questions (FAQ)
Here are some common questions about the Renogy 400W Solar Kit:
How much power can I realistically generate with the Renogy 400W?
On average, you can expect to generate 1.6-2.5kWh of electricity per day with this kit, depending on your location and sunlight availability.
Is the Renogy Kit suitable for all types of tiny homes?
Yes, the kit is versatile and can be adapted to most tiny homes, whether on wheels or a fixed foundation. Just ensure you have sufficient space for the panels.
What maintenance does the Renogy Solar Kit require?
Maintenance is minimal, usually involving cleaning the panels and checking connections a few times a year.
Can I install the Renogy Kit myself, or do I need a professional?
While many homeowners successfully install the kit themselves, hiring a professional is recommended if you’re not comfortable with electrical systems or working at heights.
Are there additional costs after purchasing the kit?
Beyond the initial purchase, you may need to budget for a battery system, additional mounting equipment, or professional installation, if necessary.
Expanding Your Solar Capacity
If you’re finding that your energy needs are growing, or if you’re planning to expand your tiny home or its energy demands, you may be considering increasing your solar capacity. The good news is that the Renogy 400W Solar Kit is designed to be expandable. Here’s what you need to know to expand your system:
- Assess your current and future energy needs to determine how much additional capacity you require.
- Check if your existing charge controller can handle the increased power or if you need an upgrade.
- Research compatible solar panels that can be added to your existing array.
- Ensure your mounting space can accommodate additional panels.
- Consider the need for additional batteries to store the extra energy you’ll be generating.
Expanding your solar system can be a cost-effective way to meet increased energy demands without having to replace your existing setup.

Financial Incentives and Rebates
Investing in solar energy is not only good for the environment but can also be good for your wallet. There are several financial incentives and rebates available to help offset the initial costs of solar installation. These may include:
- Federal Investment Tax Credit (ITC), which allows you to deduct a percentage of your solar costs from your taxes.
- State and local rebates and incentives, which vary by location and can significantly reduce upfront costs.
- Solar Renewable Energy Credits (SRECs), which can be sold or traded, offering you a return on your investment.
- Net metering programs, which allow you to sell excess electricity back to the grid.
Research the incentives available in your area to take full advantage of the financial benefits of going solar.